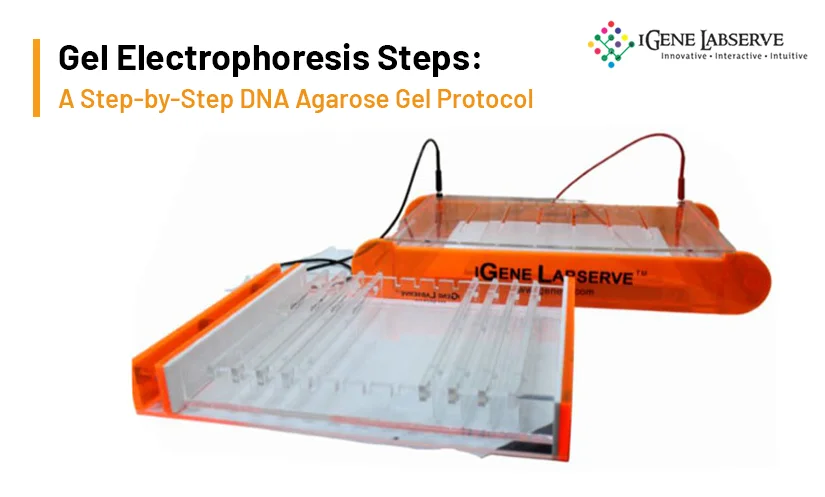
DNA gel electrophoresis is a laboratory method used to separate DNA fragments according to their size. In agarose gel electrophoresis, DNA moves through an agarose matrix when an electric field is applied. Smaller DNA fragments generally move through the gel more easily than larger fragments, allowing researchers to separate and compare DNA samples.
A well-planned gel electrophoresis procedure involves more than loading DNA into a gel. The agarose concentration, electrophoresis buffer, DNA ladder, sample preparation, running conditions and staining method can all affect the quality of the final bands.
This guide explains the main gel electrophoresis steps, from agarose gel preparation to DNA band analysis, along with practical considerations for choosing gel concentration and troubleshooting common problems.
What Is Gel Electrophoresis?
Gel electrophoresis separates charged molecules by allowing them to migrate through a gel under an electric field. DNA has a negatively charged phosphate backbone, so DNA fragments migrate toward the positive electrode during electrophoresis.
In agarose gel electrophoresis, the gel acts as a molecular sieve.
When it comes to DNA fragment size, the smaller ones generally migrate faster and farther through the gel than larger fragments.
The technique is commonly used for applications such as PCR product analysis, DNA fragment separation, cloning workflows and other molecular biology procedures.
Materials and Equipment for DNA Gel Electrophoresis
The materials required can vary according to the sample type, gel system and staining method. A typical agarose DNA gel electrophoresis setup includes:
- Agarose powder
- Electrophoresis buffer such as TAE or TBE
- DNA samples
- DNA loading dye
- DNA ladder or molecular size marker
- Gel casting tray
- Gel comb
- Electrophoresis chamber
- Power supply
- DNA stain
- Appropriate gel visualization system
- Gel documentation system
- Personal protective equipment
Before beginning, check the gel electrophoresis protocol such as manufacturer’s instructions for the electrophoresis chamber, power supply, DNA stain and visualization equipment.
How to Choose Agarose Gel Concentration?
Agarose gel concentration affects how effectively DNA fragments of different sizes can be separated. Lower agarose concentrations generally provide better separation of larger DNA fragments, while higher concentrations are useful when resolving smaller fragments.
The appropriate concentration of gel electrophoresis method depends on the expected DNA fragment size and the resolution required for the experiment.
For routine DNA analysis, laboratories commonly use agarose concentrations within a broad range, but there is no single concentration that is correct for every sample.
Consider these factors when selecting the gel concentration:
- Expected DNA fragment size
- Size range of the DNA ladder
- Required separation between bands
- Sample type
- Electrophoresis system being used
Agarose gel preparation based on the expected fragment range is more useful than selecting a percentage simply because it is commonly used.
Gel Electrophoresis Step-By-Step Procedure
Take look below to understand the gel electrophoresis steps:
Step 1: Prepare the Agarose Gel
- Calculate the amount of agarose gel required for the desired concentration and volume.
- Mix the gel with the selected electrophoresis buffer according to the laboratory protocol.
- Heat the mixture until the agarose gel has completely dissolved and the solution appears clear.
- Allow the molten agarose to cool sufficiently before pouring it into the casting tray.
- Position the comb correctly and pour the solution into the tray. Allow the gel to solidify completely before removing the comb.
The final gel should have clearly formed wells without cracks or major surface defects.
Step 2: Prepare the DNA Samples
- Prepare the DNA samples according to the requirements of the experiment.
- Add an appropriate DNA loading dye to each sample. Loading dye increases sample density, helps the sample settle into the wells and provides tracking dyes that allow migration to be monitored during electrophoresis.
- Mix the samples carefully and briefly centrifuge them if required by the laboratory workflow.
For standard non-denaturing agarose gel electrophoresis of double-stranded DNA, heating the DNA samples to 95°C is not normally required. Sample heating should only be performed when the specific protocol or sample preparation method calls for it.
Step 3: Prepare the Electrophoresis Chamber
- Place the solidified agarose gel into the electrophoresis chamber with the wells positioned correctly relative to the electrodes.
- Add appropriate running buffer until the gel is adequately covered according to the manufacturer’s instructions for the electrophoresis system.
- Check the orientation carefully before loading the samples. DNA migrates toward the positive electrode, so incorrect orientation can cause the samples to migrate in the wrong direction.
Step 4: Load the DNA Ladder and Samples
- Load the appropriate DNA ladder into one well. The ladder provides reference bands that can be used to estimate the size of DNA fragments in the samples.
- Carefully load the prepared DNA samples into the remaining wells. Avoid puncturing the wells or allowing the pipette tip to pass through the bottom of the well.
- A DNA ladder for gel electrophoresis should be selected according to the expected size range of the DNA fragments being analysed.
Step 5: Run the Gel
- Connect the electrophoresis chamber to the power supply and verify that the electrodes are connected correctly.
- Set the voltage according to the gel system, gel dimensions, buffer and laboratory protocol. Avoid treating one voltage or running time as a universal setting for every electrophoresis system.
- Excessive voltage can generate heat and may affect band migration and resolution. Running conditions should therefore be selected to provide adequate separation without unnecessarily overheating the gel.
- Monitor the tracking dye during the run and stop the electrophoresis when the DNA fragments have migrated an appropriate distance for the analysis.
Step 6: Stain and Visualize the DNA
- After electrophoresis, follow the staining method specified for the DNA stain being used.
- DNA-binding stains can be incorporated into the gel or used after electrophoresis depending on the staining system. Follow the manufacturer’s instructions for stain concentration, staining time, washing and visualization.
- Use the appropriate visualization system to observe the DNA bands. UV or blue-light systems may be used depending on the stain and laboratory equipment.
Record the gel image using a suitable gel documentation system.
How to Choose a DNA Ladder
A DNA ladder contains DNA fragments of known sizes and provides a reference for estimating the size of sample bands.
Choose a ladder whose range covers the expected fragment sizes in your samples.
For example, a ladder intended for relatively large DNA fragments may not provide sufficient resolution for very small PCR products. Similarly, a small-fragment ladder may not be suitable when analysing much larger DNA fragments.
When selecting a DNA ladder, consider:
- Expected DNA fragment size
- Number and spacing of ladder bands
- Required size resolution
- Agarose concentration
- Intended application
Loading the appropriate ladder alongside the samples makes it easier to estimate DNA fragment size after electrophoresis.
TAE vs. TBE Buffer for DNA Electrophoresis
TAE and TBE are commonly used buffers for agarose gel electrophoresis.
TAE, or Tris-acetate-EDTA, is widely used for routine DNA electrophoresis and can be useful when DNA recovery from the gel is part of the workflow.
TBE, or Tris-borate-EDTA, has stronger buffering capacity and is commonly used in applications where good resolution is required.
The choice between TAE and TBE should depend on the application, desired resolution, downstream workflow and laboratory protocol rather than assuming that one buffer is always better.
How to Read DNA Gel Electrophoresis Results
After visualization, you need to compare the sample bands with the DNA ladder to estimate the fragment size.
A clear single band may indicate that the sample contains a predominant DNA fragment of the expected size. Multiple bands may indicate different DNA fragments or non-specific products, depending on the experiment.
Smearing may indicate degraded DNA, excessive sample loading, poor sample quality or unsuitable electrophoresis conditions.
When interpreting the results, you must consider:
- Band position
- Band intensity
- Number of bands
- Band sharpness
- Migration relative to the DNA ladder
- Expected fragment size
Results should always be interpreted in the context of the specific experiment.
Common DNA Gel Electrophoresis Problems and Solutions
Check the gel electrophoresis troubleshooting guide:
Why are my DNA bands smeared?
Smearing can result from degraded DNA, overloaded samples, sample impurities or unsuitable running conditions. Review sample quality, loading quantity, gel concentration and electrophoresis conditions.
Why are the DNA bands faint?
Faint bands can occur when the sample contains a low amount of DNA or when staining or visualization conditions are not suitable. Check the sample concentration, staining procedure and imaging settings.
Why are my DNA bands running off the gel?
DNA fragments can migrate beyond the useful separation range when the gel is run for too long or when the selected gel conditions are unsuitable for the fragment size.
Why do DNA bands appear curved or uneven?
Uneven or curved bands can be associated with excessive heating, uneven gel conditions, improper buffer conditions or excessive voltage.
Why is there poor separation between DNA bands?
Poor resolution can result from an unsuitable agarose concentration, inappropriate DNA ladder, overloaded samples or running conditions that do not match the expected fragment size.
Why are there no visible DNA bands?
Possible causes include insufficient DNA, staining or visualization problems, incorrect sample preparation, an unsuccessful upstream reaction or an issue with the electrophoresis setup.
DNA Gel Electrophoresis Safety Considerations
Follow the safety instructions supplied with the electrophoresis chamber, power supply, DNA stain and visualization equipment.
Important precautions include:
- Switch off and disconnect the power supply before opening the electrophoresis chamber.
- Wear appropriate laboratory PPE.
- Follow the safety instructions for the DNA stain being used.
- Avoid direct exposure to UV radiation.
- Handle stained gels and laboratory waste according to the applicable safety procedures.
- Follow the manufacturer’s instructions for all electrophoresis and visualization equipment.
Choosing a DNA Gel Electrophoresis System
The DNA electrophoresis system should be selected according to the laboratory’s sample volume, gel size and application requirements.
Here re the important factors:
- Gel dimensions
- Number of wells
- Comb configuration
- Sample capacity
- Buffer requirements
- Casting method
- Electrode design
- Safety features
- Compatibility with the laboratory workflow
For laboratories regularly performing DNA analysis, selecting an electrophoresis system that matches expected sample throughput and gel requirements can make routine workflows more consistent.
Conclusion
A reliable DNA gel electrophoresis procedure depends on more than simply running DNA through an agarose gel. Selecting an appropriate gel concentration, DNA ladder and running electrophoresis buffer, loading the samples carefully and using suitable visualization conditions can all affect the final result.
Understanding these gel electrophoresis steps and common troubleshooting points can help laboratories obtain clearer DNA separation and make more reliable interpretations of electrophoresis results.
Frequently Asked Questions
The main gel electrophoresis steps include preparing the agarose gel, preparing the DNA samples, placing the gel in the electrophoresis chamber, loading the DNA ladder and samples, running the gel, and staining or visualizing the DNA bands.
Agarose gel electrophoresis is used to separate DNA fragments according to their size so that researchers can analyse and compare DNA samples.
Agarose concentration should be selected according to the expected DNA fragment size and the resolution required. Higher concentrations are generally useful for smaller DNA fragments, while lower concentrations can be more suitable for larger fragments.
A DNA ladder contains DNA fragments of known sizes and provides a reference for estimating the size of DNA bands in electrophoresis samples.
Smearing may result from degraded DNA, excessive sample loading, impurities or unsuitable electrophoresis conditions. The exact cause should be assessed based on the sample and experimental setup.
TAE and TBE are both electrophoresis buffers used with agarose gels. Their buffering characteristics and suitability for different workflows vary, so the choice should be based on the application and laboratory protocol.